
If you are using BlogrCart BUTIK Version 1.6 or below, please use the Version 1 theme tutorial for installation available at main navigation.NEW! Provided with this theme download, your blog store will have sample contents to work with. Most of template details ie. slider images, header images, sectional texts, sectional titles is not available since that these contents are linked to your Blog widgets used. You can easily add in using the assigned widgets provided - no programming knowledge required!
Find below all the necessary details to add & customize your BlogrCart theme. Click panel title to expand & view its contents.
Update: If however you could not find Store Configuration & Theme Configuration helper widget pre-installed with theme at your dashboard, it is most likely hidden away due to Blogger layout styles conflict. To display these widget:-
- Go to
Template HTML - Scroll to bottom & you will reach below:-
<b:section class='plug-ins sr-only hidden' id='plug-ins' name='Settings & Config (Activate Plug-ins Widget Below)' showaddelement='no'>
- Remove class by name "hidden" and
Save Template. - Now at dashboard layout the widget helpers will display for you to custom set your settings.
Doc Ver: 2.2 - Last Updated 4h October 20161.0 Theme Installation
Walk through & detail instructions how to upload & install a Blogger template & uploading sample contents.
Important! Upgrading from Version 1.++ to Version 2.++ theme will override your current theme setup (include widgets). We highly recommend you create a development blog & install the new version there.
Theme compatibility means, how the product pages & shopping cart plugin are compatible with one version to the other. Blogger platform does not store or keep your current template setups. Download your current template to your PC before customizing your theme.
Find template files in your computer &
Go to your
Click

A window pop over will appear to search for template file. Locate your extracted download template file inside the
You can remove/delete the sample pages later once you are 100% sure the template is working as you require too. This really helps you speed up you product listing!


Below are example pages pre-built upon this Pages install. You can remove the example product posts when you have tested out all the functionalities or custom setups.

Example pages pre-built for checkout page, seuccess page anr error handling page.

extract the files to view the template folders.Copy & Paste Method (Preferred)
The most easiest ( & preferred ) way is to open the extracted downloaded template file > find.../Upload/Template folder > find template file & Open its content using a basic text editor > Select All (keyboard Ctrl+A for Windows) the file contents > Copy (mouse right click + Copy) the file contents.Go to your
Blogger Dashboard > Template > click Template HTML > Select All the existing template codes > now PASTE the COPIED template contents.Click
Save Template & preview.Uploading Template Files (Not recommended)
UNZIP/EXTRACT & upload using Blogger dashboard > Template > Backup/Restore > at Upload a template from a file on your hard drive. > click Choose File button. Preview your new template.Upload Sample Pages (IMPORTANT)
Upload using Blogger dashboard >Settings > Others > at Import and Backup > click the Upload Content button > tick the Captcha box > tick the Automatically publish all imported posts and pages options & click the Upload from Computer button.A window pop over will appear to search for template file. Locate your extracted download template file inside the
Upload folder with the ...PAGES.xml file name title. Choose this file to begin your sample pages upload.You can remove/delete the sample pages later once you are 100% sure the template is working as you require too. This really helps you speed up you product listing!
Example pages pre-built for checkout page, seuccess page anr error handling page.
Other important Blogger theme settings you might/have to consider.

To allow this theme to display correctly in mobile screens, turn off Blogger default mobile theme by going to
This theme already comes equipped with mobile view styling which also allows the template enhanced functions to work properly.

By doing so, this will also activate the

Allow Blog Feed to Full
Make sure to your blog settings is set toAllow Blog Feed to Full in order to retrieve your blog posts RSS feed. This feed is required to allow this theme to retrieve your blog data for its enhancements.Make Blog Public
Making the Blogpublic assures your blog can access its data feed at Google/Blogger servers which is used by theme plug-ins. If setting to Private, access to your blog feed will be disabled & certain theme plug-in will not be running as expected.
Turn off Blogger Mobile Template
To allow this theme to display correctly in mobile screens, turn off Blogger default mobile theme by going to Settings, Mobile section, click the Gear button & select No. Show desktop template on mobile devices. , Then click Save.This theme already comes equipped with mobile view styling which also allows the template enhanced functions to work properly.
Add a Meta Description
Meta tags plays a vital role in giving your Blogger that extra boost in search engine result pages. To activate your Blog & product pages meta descriptions, atSettings > Search Preferences > Meta Tags > write a short description describing your blogger store in not more than 160 word counts.By doing so, this will also activate the
Search Description feature at your individual blog/product posts where it allows you to include your custom products meta description tags,
To help speed up your product listings, when editing your product posts, an
Copy the mark-up in your download template files inside the
Paste the copied
 .
.
Once completed, each time you create a product post, this helper will automatically load to your blog editor. Edit/change the images, texts & data to personalize each product post listing. If the data is not used keep the field empty. More information is found at the automated auto post template body for your reference.
Users can also attached multiple Labels to a posts for categorization purposes.
Auto Template Helper is required to retrieve data used for the shopping cart.Copy the mark-up in your download template files inside the
.../Helper folder. Then go to your Blogger Dashboard > click Settings > got to Post & Comments > & at Post Template click Add link.Paste the copied
auto post template helper mark-up inside the textarea field provided, then click Save SettingsCreating a Product Post Page
Once completed, each time you create a product post, this helper will automatically load to your blog editor. Edit/change the images, texts & data to personalize each product post listing. If the data is not used keep the field empty. More information is found at the automated auto post template body for your reference.
IMPORTANT!- Use
line breaksto separate your post data from images to allow maximum posts to display on index/gallery pages. Upload all images larger than 600px in widthto allow a crisp & clear image display at your page. Always set the first image with the "Original Size" option.
Users can also attached multiple Labels to a posts for categorization purposes.
To allow Theme Plug-ins gadget to register itself with your new Blogger template install, users are required to activate the
Click

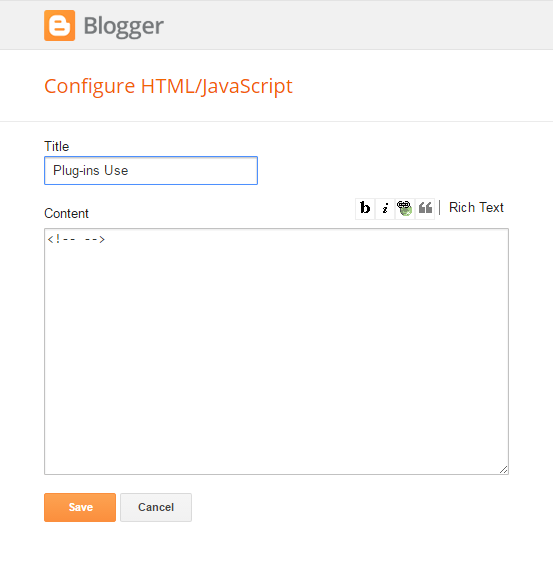
HTML/Javascript gadget with the title Plugin or DoNotRemove Cart Plugins or Plug-ins Cart located at the bottom of theme Dashboard > Layout.Click
Edit the assigned gadget & add some content to save it. This content will not display & only required for this widget to register with your Blog. View screenshot below for reference.2.0 Theme Layout
Edit text or upload images to personalize your Blogger store theme using Blogger default widgets pre-installed with theme - add, remove, re-arrange Blogger widgets here to your own preferences.
This Blogrcart theme comes with a custom dashboard with loads of indicators to help you customize your Blogger store. Pre-assigned widgets have been included in order to speed up your blog store display & customization without editing a single code!

Edit/update theme text or upload an image as store logo to display at template headers.
Below is an example how to use Blogger Template Designer features from your dashbaord.

Upload image best size is below 50px in height to allow your image logo to tuck inside the navigation bar. Any image width is accepted since that the uploaded image will contain inside the navigation bar. Please consider to upload image at below 100kb in file size for best page rendering/display.

Blog Store Name
Select preferred fonts & colors using Blogger Template Designer features to change your template logo. This store name can also be updated using the Blogger Header widget located at your dashboard >Layout.Below is an example how to use Blogger Template Designer features from your dashbaord.
Blog Store Description
The description feature is hidden but render with theme.Upload Image as Header Logo
To upload an image clickUpload Image link > find your image & select image to upload from your PC > choose Instead of Title & Description > click Save to save your custom setup. Click Preview Template or refresh your browser window to view your changes.Upload image best size is below 50px in height to allow your image logo to tuck inside the navigation bar. Any image width is accepted since that the uploaded image will contain inside the navigation bar. Please consider to upload image at below 100kb in file size for best page rendering/display.
Adding text and key-specific text to display a navigation link or create a dropdown link automatically using Blogger LinkList gadget. Below are the conditions:-
Supports unlimited links. Usage of the
Displayed collapsed on smaller screen sizes with button navigation for optimal user experience on mobile / smaller screen sizes.
Or while clicking the up or down arrow, press Alt at your keyboard (Windows) simultaneously. This will trigger a


The end results will look like so:-

- Adding a text in New Site Name field will display as top level navigation link.
- Add a text
before or aftera text link displays as a top level navigational link - Add an underscore "
_" (with no spaces) following text to start create a dropdown link. - An underscored "
_" (with no spaces) following textbefore/afteran underscored link text will continue to group & display as a dropdown link. - Add a text without underscore
afteran underscored text link will stop grouping dropdown links & displays as a top level navigational link.
Supports unlimited links. Usage of the
up & down arrows to re-arrange/organize links.Displayed collapsed on smaller screen sizes with button navigation for optimal user experience on mobile / smaller screen sizes.
Heads Up!: A common default browser behavior will occur when updating link placement during clicking the arrow link. To prevent this behavior press F12 & add in javascript handlers at browser console log to stop this "jumping" browser behavior.Or while clicking the up or down arrow, press Alt at your keyboard (Windows) simultaneously. This will trigger a
Save to PC pop over & continue to click the Cancel button.The end results will look like so:-
Note: By adding links using the Navbar Menu widget will automatically display the shopping cart view buttons & dropdowns.
This section uses Blogger Image widgets to upload the required images from your PC with editable title text, caption button & button link to.
To upload a new image go to
Image size used preferably
To prevent your page from jumping due to different image height uploaded during slider transitions, the plugin will attempt to resize your height according to the first image height uploaded. Smaller images will not be effected as it will expand proportianetly, but larger images will be cropped. Due upload images at a consistent width or height.
The slider height is using CSS to control the container height to a 4:3 or 16:9 ratio for any screen size. In order for you to custom or set the slider height, add below mark-up at
Custom set the percentage amount at

Use below parameters to custom set your responsive image slider default settings at
To upload a new image go to
Dashboard > Layout > find Homepage Image Slider section > click Edit the assigned widget. For each Image widget assigned at this section...Titlefield - text entered here will display as this section Title.Captionfield - text entered here will display as this section caption.Linkfield - add a URL to assign the image & text to link to. If a link is not required, users are required to enter " # " in replacement.Image- Click the upload button > find the image to upload in your PC > clickUpload. Once your image is displayed at the widget clickSaveto save your settings.
Image size used preferably
1200px in width & 900px in height (4:3 image ratio) at below 150kb in file size. The image container will resize your image proportionately on various screen sizes & maintain aspect ratio.To prevent your page from jumping due to different image height uploaded during slider transitions, the plugin will attempt to resize your height according to the first image height uploaded. Smaller images will not be effected as it will expand proportianetly, but larger images will be cropped. Due upload images at a consistent width or height.
IMPORTANT! Only Blogger Image widget is used for this section. You can add more slider images by selecting & inserting more Blogger Image widget & re-arrange the image slider sequence accordingly.Customizing Slider Height
The slider height is using CSS to control the container height to a 4:3 or 16:9 ratio for any screen size. In order for you to custom or set the slider height, add below mark-up at
Template HTML before the </b:skin> tag to override theme defaults:-@media (min-width:768px) {
.slider-wrapper > div:before, .slider-image:after { padding-top: 56.25%; }
}
Custom set the percentage amount at
padding-top to your required height. Percentage height included here is the percentage height to the width ratio. whereas:-- 75% = 4:3 ratio - meaning slider height is 75% of the slider width.
- 56.25% = 16:9 ratio - meaning slider height 56.25% of the slider width.
- 133.333333% = 3:4 ratio - meaning slider height 133.33333% of the slider width. this will display in a portrait orientation.
- 100% = 1:1 ratio (squared) - meaning slider height equals to the slider width.
Use below parameters to custom set your responsive image slider default settings at
Theme Configuration widget.| Custom Gadget Location | Theme Configuration Gadget | ||
| Reference in Template HTML | <b:includable id='js-image-slider'> ... </b:includable> | ||
Parameterslider_* | Values or Type of Value to Use | Description | Default |
|---|---|---|---|
| slider_autoplay | true or false | Enables or disables the slider autoplay. | true |
| slider_autoplay_speed | number / integer | Slider transition timing in milliseconds when autoplay is enabled. | 2000 |
| slider_infinite | true or false | Enables or disables looping of slider posts/images. | true |
| slider_pause_on_hover | true or false | Enables or disables image slider when a mouse or touch hover. | false |
| slider_arrows | true or false | Enable or disable the display of slider next or previous arrows. | true |
| slider_fade | true or false | Enable or disable the slider fade effect. If set to false the slider will move from right to left transition effect. | true |
| slider_dots | true or false | Enable or disable the display of slider pagination. | true |
| slider_speed | number / integer | Slider transition speed in milliseconds. | 2000 |
Pre installed section to easily include custom text, advertisement banners, promotion updates using Blogger HTML/Javascript gadget.
Text entered here will display throughout the entire blog. If no text or leaving it empty will not allow the gadget to be saved - a default Blogger gadget behavior. To save an empty ads section HTML/Javascript gadget
To create a link able banner add, add a link with an uploaded image URL to display an image or insert your ads HTML markup to display as your ads. Below is an example:-
Click
You can add any type of text or HTMl markup using available Blogger widgets. There are no specific styling designated for this section, which allows you to include your own styling accordingly.
Text entered here will display throughout the entire blog. If no text or leaving it empty will not allow the gadget to be saved - a default Blogger gadget behavior. To save an empty ads section HTML/Javascript gadget
remove gadget title & add <!-- --> inside the gadget body > click Save. This section will not display at your blog.To create a link able banner add, add a link with an uploaded image URL to display an image or insert your ads HTML markup to display as your ads. Below is an example:-
<a href="http://url-to-link-to.com">
 <img src="http://url-to-an-uploaded-image.jpg" alt="Some image title" />
</a>
Click
Save to save or update you custom edits.You can add any type of text or HTMl markup using available Blogger widgets. There are no specific styling designated for this section, which allows you to include your own styling accordingly.
Use Blogger Blog gadget settings to customize various Blogger post functionalities which includes:-
Most of Blogger Blog1 widget functions are use able, as activated on any default Blogger Template made available from the dashboard.

To hide the Blogger Blog1 widget post footer entirely, at Label field add "

- The amount of posts to show at home page or index pages.
Most of Blogger Blog1 widget functions are use able, as activated on any default Blogger Template made available from the dashboard.
hide-post-footer " inside the text field. Click Save widget and automatically the theme will hide Blog1 post footer provided.
The sidebar is displayed on the left of page on all pages. Add/ remove/ arrange any Blogger default widgets accordingly. Some default Blogger widgets custom styles have already been pre assigned. Update the sidebar styling made available via Blogger Template Designer.

Display a social media icon: Facebook
Display a social media icon: Facebook (squared)
Display a social media icon: Facebook (3x larger than the font size)
Display a social media icon: Facebook (squared & 3x larger than the font size)
Select or choose over 500+ icons by using the icons "
Some Examples Display Icons Using LinkList Widget.
Display a social media icon: Facebook
- At New Site Name field add
<i class="fa fa-facebook fa-lg"></i> - At New Site Name field add the
full URLto your profile page. - Click
Save Link.
Display a social media icon: Facebook (squared)
- At New Site Name field add
<i class="fa fa-facebook-square fa-lg"></i> - At New Site Name field add the
full URLto your profile page. - Click
Save Link.
Display a social media icon: Facebook (3x larger than the font size)
- At New Site Name field add
<i class="fa fa-facebook fa-3x"></i> - At New Site Name field add the
full URLto your profile page. - Click
Save Link.
Display a social media icon: Facebook (squared & 3x larger than the font size)
- At New Site Name field add
<i class="fa fa-facebook-squared fa-3x"></i> - At New Site Name field add the
full URLto your profile page. - Click
Save Link.
Select or choose over 500+ icons by using the icons "
tag" names & mark-up provided above provide by the great people from Font Awesome http://fontawesome.io/icons/
A featured section can be included using ANY LINKLIST widget by adding at ABOVE or BELOW the Blog widget at Layout. This featured section can show products/posts:-
By default a featured section using an assigned
At the assigned
- Most recently published.
- By Label product/posts is tagged with
- In random order.
- Custom set the amount to show
- Custom set pre-set view display.
By default a featured section using an assigned
LinkList widget have already been installed at Blog widget section.Activate a Featured Section
At the assigned
LinkList widget > click Edit > & add below parameters:-- At New Site Name field add parameter
featured - At New Site URL field add value
true - Click
Save linkto save your parameter. - Click
Saveto save this widget.
Preview your theme and by now, at homepage, a featured section will display showing the recent products/posts published at your blog store.
Update Amount of Posts to Display at Featured Section
At the assigned
LinkList widget > click Edit > & add below parameters:-- At New Site Name field add parameter
featured_max_display - At New Site URL field add value
8 - Click
Save linkto save your parameter. - Click
Saveto save this widget.
The above example shows to display
8 posts at this Featured Section.Update Featured Section Layout Styles
The plugin installed already equipped with several layout for users to use. In this example (like shown at demo), the first post has a larger image size & posts after has a squared image display. To create this, at the assigned
LinkList widget > click Edit > & add below parameters:-- At New Site Name field add parameter
featured_layout_class - At New Site URL field add value
feat-large-first - Click
Save linkto save your parameter. - Click
Saveto save this widget.
Preview your Featured Section & by now this section will display exactly like shown at demo.
Adding more Featured Section
Adding more featured section is easy just by adding a new LinkList widget & placing it ABOVE or BELOW the Blog1 widget at your Blogger layout. Use the above methods to activate & custom set individually your newly activated Featured Sections.
There are many parameters that can be used to custom set your Featured Section just by adding it at the assigned LinkList widget. Use below table to set & personalize your featured sections.
| Custom Gadget Location | Theme Configuration Gadget | ||
| Reference in Template HTML | <b:includable id='js-featured'> ... </b:includable> | ||
Parameterfeatured_* | Value or Type of value to Use | Description | Default |
|---|---|---|---|
| featured_label | text / string | The name/text of the Label to display posts. | |
| featured_max_display | number / integer | The amount of posts to display. | 4 |
| featured_max_feed | number / integer | The amount of posts to retrieve from Blogger servers. | 20 |
| featured_layout_class | custom set | Set a custom class name to display a customize style. Available preset layout class:- feat-large-firstDisplays the first post 200% larger than the other posts. First post image is at 4:3 ratio in portrait orientation. Other posts images is at 1:1 squared. image-1-by-1Displays all post images at squared 1:1 ratio image-4-by-3Displays all post images at squared 4:3 ratio landscape orientation. image-3-by-4Displays all post images at squared 4:3 ratio portrait orientation. image-16-by-9Displays all post images at squared 16:9 ratio landscape orientation. image-9-by-16Displays all post images at squared 16:9 ratio portrait orientation. | |
| featured_fade_timing | true or false | The timing in milliseconds the fade effect when displaying the featured posts/products | 1500 |
Featured Feed Displays | |||
| feed_random_order | true or false | Enables or disables display of posts in random order. | false |
| feed_wrapper_element | li or div | The DOM element to use to wrap all post received. Available li or div | div |
| feed_class | text / string | Assign a custom class name to each post container. | col-sm-3 |
| feed_show_title | true or false | Displays the post title. | true |
| feed_title_chars | string / text | The amount of chars to display for post titles. | 45 |
| feed_show_image | true or false | Enables or disables display of posts image. | true |
| feed_image_thumbnail | true or false | Enable or disables display post images in a squared thumbnail format | false |
| feed_image_size | number / integer | Image size in pixels to retrieve from Blogger | 640 |
| feed_image_default | url | A url to an uploaded image to replace post images if not found/available | http://3.bp.blogspot.com/-O-ykRe1bMOc/UV-70Dzkh5I/AAAAAAAAFbg/mceiiMid-XE/s1600/_notavailable.jpg |
| feed_show_summary | true or false | Enables or disables display of post summary. | false |
| feed_summary_chars | number / integer | The amount of chars for post summary. | 160 |
| feed_summary_more | text / string | Text to display when summary has been shortened. | [...] |
| feed_show_meta | true or false | Enables or disables display of post meta which includes:-
| false |
| feed_show_date | true or false | Enables or disables display of post date. | true |
| feed_date_format | pre-defined | Date format:-ddmmyyDisplays day, month, year mmddyyDisplays month, day year | ddmmyy |
| feed_date_numeric | true or false | Enables or disables display of post date in numeric format. | false |
| feed_date_spacer | text / HTML | Character for date spacer | / |
| feed_show_author | true or false | Enables or disables display of post author. | true |
| feed_author_name | text / HTML | Text to replace default Author name. | |
| feed_author_image | url | URL to author image if none is found. | 2000 |
| feed_show_comments | true or false | Enables or disables display of post comments. | true |
| feed_comments_text | text / HTML | Display of comment text. | comment |
| feed_comments_none_text | number/integer | Display of comments text if no comments | No comments |
| feed_show_price | true or false | Enables or disables display of price (if available). | true |
| feed_show_status | true or false | Enables or disables display of post status (if available). | true |
| feed_currency | text / HTML | Currency symbol to display. | $ |
| feed_currency_after | true or false | Displays currency symbol after price. | false |
Pre installed section to easily include custom text, advertisement banners, promotion updates using Blogger HTML/Javascript gadget.
Text entered here will display throughout the entire blog. If no text or leaving it empty will not allow the gadget to be saved - a default Blogger gadget behavior. To save an empty ads section HTML/Javascript gadget
To create a link able banner add, add a link with an uploaded image URL to display an image or insert your ads HTML markup to display as your ads. Below is an example:-
Click
Text entered here will display throughout the entire blog. If no text or leaving it empty will not allow the gadget to be saved - a default Blogger gadget behavior. To save an empty ads section HTML/Javascript gadget
remove gadget title & add <!-- --> inside the gadget body > click Save. This section will not display at your blog.To create a link able banner add, add a link with an uploaded image URL to display an image or insert your ads HTML markup to display as your ads. Below is an example:-
<a href="http://url-to-link-to.com">
 <img src="http://url-to-an-uploaded-image.jpg" alt="Some image title" />
</a>
Click
Save to save or update you custom edits.Heads Up!: This section is scroll able on smaller screen sizes to accommodate banners wide appearance.4 columns have been assigned to display at theme footer with similar column sizes. For optimal footer gadget content display, the columns spreads in multiple widths on smaller screen sizes.Add/ remove/ arrange any Blogger default widgets here accordingly. Some default Blogger widgets custom styles already has been pre assigned.
Upon initial theme install, some sample Blogger widgets have been assigned. You can activate these widgets by clicking the
Edit link & Save it. You can add in your own widgets by clicking the Add a Gadget link & select your required widget.
Example HTML Markups
In download files, example mark-ups is also included to easily copy & paste and custom set social icons display/links. Use the files located at
.../widget_codes/ folder and add it at any HTML/Javascript widget.Some Examples Display Icons Using LinkList Widget.
Display a social media icon: Facebook
- At New Site Name field add
<i class="fa fa-facebook fa-lg"></i> - At New Site Name field add the
full URLto your profile page. - Click
Save Link.
Display a social media icon: Facebook (squared)
- At New Site Name field add
<i class="fa fa-facebook-square fa-lg"></i> - At New Site Name field add the
full URLto your profile page. - Click
Save Link.
Display a social media icon: Facebook (3x larger than the font size)
- At New Site Name field add
<i class="fa fa-facebook fa-3x"></i> - At New Site Name field add the
full URLto your profile page. - Click
Save Link.
Display a social media icon: Facebook (squared & 3x larger than the font size)
- At New Site Name field add
<i class="fa fa-facebook-squared fa-3x"></i> - At New Site Name field add the
full URLto your profile page. - Click
Save Link.
Select or choose over 500+ icons by using the icons "
tag" names & mark-up provided above provide by the great people from Font Awesome http://fontawesome.io/icons/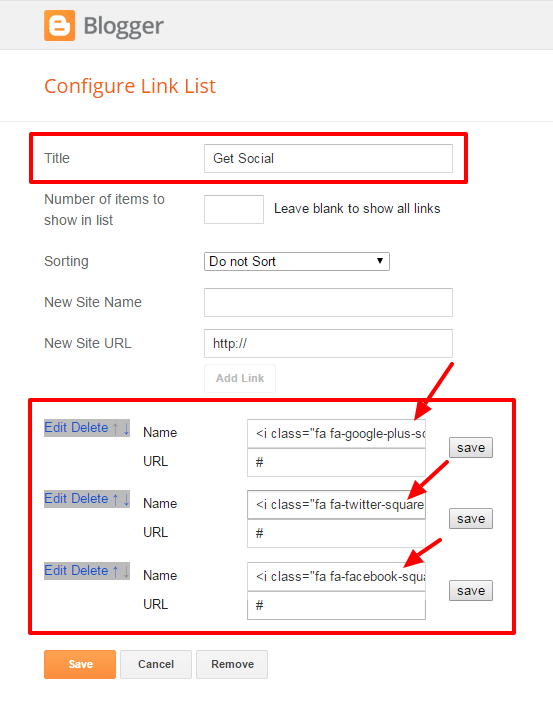
3.0 Store Setup
Setting up your Blogger store preferences & use the many e-commerce features that comes pre-installed with BlogrCart themes.
Setting up currency & custom currency for your store.
Refresh your store page & by now the shopping cart view will display the Rupiah symbol. There are 25+ preset currency have been installed. View table below to grab your currency code.
Then add in the required custom currency parameters & accompanied with your values as per table below (under Custom currency section). Save all your parameters & values and preview your changes.
If no currency is set, the shopping cart will be using USD (US Dollar) as currency by default.
Example to use preset currency
Go toStore Configuration widget, at New Site Name field add parameter currency_code & at New Site URL field add value of IDR > click Save Link > click Save widget. This will override shopping cart presets to use IDR - Indonesia Rupiah for its currencies (a working example).Refresh your store page & by now the shopping cart view will display the Rupiah symbol. There are 25+ preset currency have been installed. View table below to grab your currency code.
Example to use custom currency or to customize a preset currency.
Go toStore Configuration widget, at New Site Name field add parameter currency_method & at New Site URL field add value of custom > click Save Link. By doing this, you are notifying the plug-in to use a custom currency setup.Then add in the required custom currency parameters & accompanied with your values as per table below (under Custom currency section). Save all your parameters & values and preview your changes.
If no currency is set, the shopping cart will be using USD (US Dollar) as currency by default.
| Custom Gadget Location | Store Configuration Gadget | ||
| Reference in Template HTML | <b:includable id='js-cart-setup'> ... </b:includable> | ||
Parametercurrency_* | Values or Type of value to Use | Description | Default |
|---|---|---|---|
| currency_code | international currency code | International currency code | USD |
Here are the full list of currency_code that has been set as pre-sets with shopping cartPaypal Supported currencies USD - US Dollar (default)AUD - Australian DollarBRL - Brazilian RealCAD - Canadian DollarCZK - Czech KorunaDKK - Danish KroneEUR - EuroHKD - Hong Kong DollarHUF - Hungarian ForintILS - Israeli New SheqelJPY - Japanese YenMXN - Mexican PesoNOK - Norwegian KroneNZD - New Zealand DollarPLN - Polish ZlotyGBP - Pound SterlingSGD - Singapore DollarSEK - Swedish KronaCHF - Swiss FrancBTC - BitcoinMYR - Ringgit MalaysiaPHP - Philipines PesoTWD - Taiwan New DolarPaypal Unsupported Currencies Strongly recommend to activate paypal_currency_to_convert to checkout at Paypal using auto calcultaion to your set currency rate to Paypal's supported currencies. Refer Paypal Setup section below.INR - India RupeeVND - Vietnam DongBND - Brunei DollarIDR - Indonesia RupiahNGN - Nigeria NairaTHB - Thai BahtRUB - Russia RublePKR - Pakistani RupeeBDT - Bangladesi TakaCNY - Chinese Yuan
Example Inserting A Currency Code
 | |||
Apply below parameters with the predefined values to customise or add your custom currency if no pre-sets currency is available. | |||
| currency_method | custom | Activates custom currency for store by adding value true.If this is activated all parameters below is required. | |
| currency_code | international currency code | International currency code | USD |
| currency_name | text/string | A currency name | |
| currency_symbol | text/string/HTML supported | A currency symbol. HTML supported. | $ |
| currency_after | true or false | Displays the currency symbol after price | false |
| currency_delimiter | text/string | Currency delimiter. | , |
| currency_decimal | text/string | Currency decimal. | . |
| currency_accuracy | number/integer | Accuracy for the custom currency. | 2 |
Example for Custom Currency Setup
 | |||
Customize store shipping & checkout. By default BlogrCart themes shopping cart plugin uses 4 shipping methods which users can easily activate which are:-
- shipping flat rate
- shipping quantity rate
- shipping total rate.
- shipping options rate (optional)
Heads Up! If shipping totals is 0, the shipping container will not display.| Custom Gadget Location | Store Configuration Gadget | ||
| Reference in Template HTML | <b:includable id='js-cart-setup'> ... </b:includable> | ||
Parametershipping_* | Values or Type of value to Use | Description | Default |
|---|---|---|---|
| shipping_method | [choose one]shippingFlatRateshippingQuantityRateshipingTotalRate |
shippingFlatRateA flat rate based shipping rate regardless of quantity or totals in cart. shippingQuantityA shipping rate multiplies the total quantity in shopping cart shippingTotalRateA percentage shipping rate based on shopping cart totals. View details setup below under enhanced store setup. |
0 |
| shipping_rate | number / integer |
A shipping rate. If shippingTotalRate used, amount entered here is percentage based.Example: 10% = 10/100 = 0.01 |
|
Example Shipping Setup
 | |||
Store tax setup & assign parameters.
Heads Up! If tax total is set to 0, the tax container will not display. | Custom Gadget Location | Store Configuration Gadget | ||
| Reference in Template HTML | <b:includable id='js-cart-setup'> ... </b:includable> | ||
Parametertax_* | Values or Type of value to Use | Description | Default |
|---|---|---|---|
| tax_rate | number/integer | The tax rate to apply in percentage based. Say you require 5% as tax rate, equals to 5/100 (five divide by one hundred) & the value to enter would be 0.05 | |
| tax_shipping | true or false | If set to true calculates tax totals includes cart & shipping totals. | false |
Example Store Tax Setup
 | |||
Checkout settings for Paypal. Take note that, the form fields entered at checkout form will also be passed through to Paypal checkout page for a seamless checkout experience.
However, due to Paypal strict regulations, some form fields, which a user mistakenly enters at your checkout page, will not show up at Paypal checkout. But overall the sender's name, email, telephone, address is tested to work.
Use
To activate or set your checkout at Paypal the minimal requirement is only to set your Paypal email address. Go to
Click
However, due to Paypal strict regulations, some form fields, which a user mistakenly enters at your checkout page, will not show up at Paypal checkout. But overall the sender's name, email, telephone, address is tested to work.
Use
paypal_currency_convert & set the currency paypal_currency_to_convert if you want to use supported Paypal currencies at checkout. The shopping cart will attempt to auto calculate & convert your cart totals to the paypal_currency_to_rate that you have entered.To activate or set your checkout at Paypal the minimal requirement is only to set your Paypal email address. Go to
Store Configuration widget and enter as follows:-- At New Link Name filed add parameter
paypal_email - At New Link URL field add value
[your_paypal_email_address] - Click
Save Link
Click
Save to save your settings. Preview your Paypal checkout. Use below parameters to custom set other Paypal related function made available with theme.| Custom Gadget Location | Store Configuration Gadget | ||
| Reference in Template HTML | <b:includable id='js-cart-paypal'> ... </b:includable> | ||
Parameterpaypal_* | Values or Type of value to Use | Description | Default & Examples |
|---|---|---|---|
| paypal_checkout | false | Use this to disable Paypal checkout functions. | true (default) |
| paypal_email | email address | The email address used to checkout at Paypal & receive payments. Required to activate this plug-in.[Required] | you@yours.com |
| paypal_sandbox | true or false | Set to true to use Paypal sandbox checkout for testing purposes | falsetrue - uses Paypal sandbox environment for tests |
| paypal_success_url | URL | Full URL which includes http:// to the return page after successful checkout at Paypal | blog url |
| paypal_cancel_url | URL | Full URL which includes http:// to the error page after un-successful checkout at Paypal | blog url |
| paypal_debug | true or false | For debugging purposes. Displays paypal_ parameters at browser console log.Paypal button still made visible but checkout to Paypal is disabled. | false |
| paypal_currency_convert | true or false | Activates alternative currency to checkout to Paypal. Requires Paypal supported currency listed with simplecart(js) - refer currency section. | false |
| paypal_currency_to_convert | A Paypal currency code | International Paypal supported currency code. Conditions The value entered here will be used as the currency rate updater. Requires Paypal supported currency listed with simplecart(js) - refer currency section. | USD |
| paypal_currency_to_rate | number / integer | The currency exchange rate from store current currency to the updated currency at Paypal. | 1 |
| paypal_btn_process | text / string | The text/HTML displayed when Paypal button is clicked.[Use backslash to escape apostrophe or quotes chars. (\") or (\')] | <i class=\"fa fa-spin fa-cog fa-lg fa-fw\"/> Waiting Secured Connection... |
| paypal_btn_timer | number / integer | The timing for the paypal_btn_process to display in milliseconds. | 5000 |
Example Paypal Setup  | |||
The send email notifier is sending shopping cart data & the checkout form data to Blogger store set email & also a copy to the senders email.
It comes with a basic form validation helper which helps Blog store owners in making sure orders sent are filled accordingly.
To automatically receive the submitted form to your email, go to
Click
There is lots more of text/edits you can automatically include at the send order notifier body, for example:-
Use parameters below to the assigned widget to add in your custom text at the email notifier.
There might be some display issues for non roman text characters which depends on the character/lettering/language support at the receiving email provider end or the PC the viewer is viewing the email - please use wisely.
If you want to include apostrophe or double quotes, add a backslash (\) before it to allow Blogger to render your text correctly - if not errors will occur.
It comes with a basic form validation helper which helps Blog store owners in making sure orders sent are filled accordingly.
Note: This plugin does not save or keep data as all emails sent here is "on-the-fly" to the receiver end. There is no data kept or saved to make sure all emails sent successfully even on heavy traffic or loads.To automatically receive the submitted form to your email, go to
Store Configuration > click Edit and add below:-- At New Site Name field add parameter
my_store_email - At New Site URL field add
your [A Valid Email Address] - Click
Save linkto save your parameter.
Click
Save to save your setup. By now, at checkout form, the send order will attempt to send the filled order form & cart data to this email you have entered.There is lots more of text/edits you can automatically include at the send order notifier body, for example:-
- Payment instructions.
- General notes.
- Your business contact details & etc.
There might be some display issues for non roman text characters which depends on the character/lettering/language support at the receiving email provider end or the PC the viewer is viewing the email - please use wisely.
If you want to include apostrophe or double quotes, add a backslash (\) before it to allow Blogger to render your text correctly - if not errors will occur.
| Custom Gadget Location | Store Configuration Gadget | ||
| Reference in Template HTML | <b:includable id='js-cart-email'> ... </b:includable> | ||
Parametermy_* | Values or Type of value to Use | Description | Default |
|---|---|---|---|
| my_store_email | email address | The email to receive the send order from checkout form. | |
| my_store_name | text | Your blog store name. | [your blog_name] |
| my_success_url | URL | The URL to redirect to after email successfully sent with http:// | [your blog_url]+/p/success.html |
| my_error_url | URL | The URL to redirect to after email NOT successfully sent with http:// | [your blog_url]+/p/error.html |
| my_store_url | URL | Your store full URL with http:// | [your blog_url] |
| my_business_name | text | Your business name | [your blog_name] |
| my_address | URL | Your business address displayed at email notifier footer. | |
| my_phone_1 | text/HTML | Your business contact number displayed at email notifier footer. | |
| my_phone_2 | number/integer | Your business contact number displayed at email notifier footer. | |
| my_phone_3 | number/integer | Your business contact number displayed at email notifier footer. | |
| my_pay_1 | text | Text displayed at payments reference section Line 1. | |
| my_pay_2 | text | Text displayed at payments reference section Line 2 | |
| my_pay_3 | text | Text displayed at payments reference section Line 3. | |
| my_note_1 | text | Text displayed at email notifier general note section Line 1. | |
| my_note_2 | text | Text displayed at email notifier general note section Line 2. | |
| my_note_3 | text | Text displayed at email notifier general note section Line 3. | |
| my_note_4 | text/HTML | Text displayed at email notifier general note section Line 4. | |
| my_new_decimal | text | Updates the decimal format at email notifier | . |
| my_new_delimiter | text | Updates the delimiter format at email notifier | , |
| my_new_accuracy | number / integer | Updates the totals accuracy format at email notifier. | 2 |
| my_currency_symbol | true or false | Enables or disables to update the currency code to use currency symbol (vice versa) at email notifier. | false |
| my_store_debug | true or false | For debugging & testing purposes. Disables/ hides the send order form button & displays the test buttons options with example form submitter details in a sliding panel. | false |
Send Order Handlers | |||
| my_email_checkout | true or false | Enables or disables the checkout button & send email functions. | true |
| my_submit_error | text / HTML | Text displayed when form errors occurs.[Use backslash to escape apostrophe or quotes chars. (\") or (\')] | Please check your form for errors. |
| my_wait_text | text / HTML | Text displayed when form on submission.[Use backslash to escape apostrophe or quotes chars. (\") or (\')] | Obtaining secured connection. Please Hold. |
| my_alert_target | text / HTML | Target a DOM element by classname or id to append the alert handler. | #checkout-summary |
| my_alert_scroll_target | text / HTML | Target DOM element by classname or id to scroll to. | #checkout-summary |
| my_alert_div | HTML | The container mark-up for alert handlers.[Use backslash to escape apostrophe or quotes chars. (\") or (\')] | <div class=\"alert alert-warning text-center alert-cart\"></div> |
Enhanced Store Features - Compatible Premium Add Ons
By default the currency changer options is
Click
USD_Text to display at currency option
^^^Capital case currency code
^Separator [REQUIRED]
^^^^^Text to display at currency rate drop down option
At
Click
Adding more Currency Options
Add in more currency options using the method above. Re-arrange your currency options using the up & down arrow. Always make sure that the first option in your widget is your current currency used at your store with the rate at 1.

disabled. To activate, go to Store Configuration widget > click Edit and add parameter/values as follows:-- At New Site Name field add parameter
currency_rates - At New Site URL field add a value of
true - Click
Saveto save your parameter.
Click
Save to update your theme configurations. Now continue to add your custom currency & currency rate values at Currency Options widget using the format below.Format to Insert as a Currency Option
Below is the format to enter atCurrency Options helper at your store dashboard. At New Site Name field enter the text format like so to include your currency code and text option displayed:-USD_Text to display at currency option
^^^Capital case currency code
^Separator [REQUIRED]
^^^^^Text to display at currency rate drop down option
- REQUIRED 1st option is store default currency with a value of 1.
- Currency code for 1st option MATCH currency code set in Store Configuration[currency_code]
- Currency code/options must be available as shopping cart currency pre-sets. If not add in the required currency of choice with shopping cart plug-in.
At
New Site URL field add in the currency exchange rate to your store currency settings. This field only accepts integers / numbers. Click
Save link to save your settings. Adding more Currency Options
Add in more currency options using the method above. Re-arrange your currency options using the up & down arrow. Always make sure that the first option in your widget is your current currency used at your store with the rate at 1.
Understanding Plug-in Concept
Using Blogger widgets to map out your shipping weight to your shipping price, this add on will find the weight in cart & extracts the price in user's selected option & update the cart totals automatically.It comes with various default values if, somehow store owners forgets to enter a weight for an item or even alert users if their cart items has reached a maximum weight, a default value has been assigned.
All of this settings can be customized accordingly using BlogrCart Blogger store template helper (Store Configuration) widget located at Blogger dashboard Layout & makes it easy for non techy users to update accordingly without knowing any coding.
Setup Shipping Select
Go toStore Configuration widget > click edit > add as follows:-- At New Site Name field add parameter
shipping_method - At New Site URL field add value of
shippingCustom - Click
Saveto save your parameter.
Click
Save to update your configurations settings.Doing this alone will not show your shipping options at checkout page. This is because you have not yet entered your options at the
Shipping Options widget.Setup Shipping Options
Setting up is made easy when you have understand the basics on the format pairing values that has been assigned with this add on plugin. But before that, findShipping Options helper widget & click edit to enter your options.There will be 2 fields assigned for this widget for an option:-
- Text entered at New Site Name field will display as the text for option at checkout.
- Inside Link URL field is where you enter the weight to price format values for this option.
Weight to Price Format (at Shipping Option Values)
An example weight to price format for a shipping option will look like so:-500:6.00 , 1000:12.00 , 1500:18.00 , 2000:36.00, 2500:42.00 , 3000:58.00 , 3500:69.00 , 4000:80.00
By default the weight is using grams as weight unit. But users can change to a different weight metric & will be detailed out later in this page. Looking at the example, the weight to price format is like so:
- Highlighted yellow is a weight unit (decimal points not allowed)
- Highlight cyan is a price in (required 2 decimal points) when this weight unit is reached.
- A ":" is the separator between weight to price pairings
- A comma " , " is the separator between each weight to price pairs.
- No ending comma is required for the last value pairs.
Explanation for the above, if the cart items reached 500(weight unit) then the shipping price will be 6.00(currency unit). And so goes if the cart weight reached 3500(weight unit), then the shipping price 69.00(currency unit)
Highlighted in yellow is the unit that the plug-in will search for. This weight unit increment must be consistent throughout the weight value entered. From the example above the increment is in 500 (weight unit).
Weight increment & its consistencies for an option is very important. This consistent increment value must be updated at
shipping_weight_increment parameter if changed. If not shipping is set to 0.Continue to add your options using the method above. Click
Save & preview your checkout page.You can also use Shipping Option Tool to help you print out the format & to allow you to copy & paste your weight price values directly to your shipping options quickly. :) http://blogrcart-mnmlis.blogspot.my/p/shipping-options-tool.html

Updating Weight Increments
If however your weight needs a different weight increments, for example 250:[some_price] , 500:[some_price], 750:[some_price] and so on, then you can update the shipping plug-in to use your new increment units.Go to
Store Configuration > add parameter shipping_weight_increment (in New Site Name field) > add value 250 (at New Site URL field) and click Save Link & Save your widget. This will override the add on to use a new incremental weight you have entered which is 250 (weight units).Important if this weight increments is changed, then you are required to edit/update other saved options using the same weight increment values. Multiple weight increment for an option will set the shipping value to 0.Updating Weight Units
By default the weight is using units equivalent to grams. This is reflected at shipping_weight_metric parameter assigned. This would be the ideal basis to convert the shipping weight to lb (pounds) or kg (kilograms) & reflect at checkout page & cart views.Currently supported 3 units which are:-
- gram(default)
- pounds (lb)
- kilograms(kg).
Using Pounds(lb) as Weight Metric
To update cart, to use pounds (lb) & display at checkout. Go toStore Configuration widget > click Edit > add parameter shipping_weight_metric (in New Site Name field) > add value lb (at New Site URL field) > click Save Link & Save your widget. New weight metric of pounds pre-calculated & displayed at checkout page & view cart.Since that the weight is based on units (grams) the pounds weight values must be converted to use grams. For example:
1/4 lb = 113.398 gram => Enter 100 as weight value as it is the closest rounded weight
or
1 1/8 lb = 623.69 gram => Enter 600 as weight value as it is the closest.
Prices for weight
Add any price value with no particular value increment. For the price units, 2 decimals places is required.Using Kilograms(kg) as Weight Metric
Kilograms is very straight forward. The item weight values is divided to 1000 to display in kilograms since that the plug-in weight unit used is based on gram weight value.Updating Maximum Weight in Cart
By default, the shipping has a 5000 (weight unit) for a maximum weight the cart could reach before displaying the alerts to users & disables the checkout form button.Required to add a consistent max weight value pairing for ALL the shipping options saved,
Based on the example above, the maximum weight is 4000(weight unit). Which means all other options are required with a maximum weight value pairing of 4000(weight unit) too.
To update the cart for this setting, Go to
Store Configurations widget > click edit > add parameter shipping_weight_max (at New Site Name field) > add value 4000 (at Link URL field) > click Save Link & Save your widget.This will update the cart to not use 5000 (default max weight unit) but to use your updated values which is
4000(weight unit) instead. If a
shipping_max_weight value is not available in a shipping option, shipping will return 0.
A Working Example
Here we are displaying 3 location shipping options based on a carrier provider in Malaysia. Below example we are providing 3 options for users to select during checkout:-- Delivery Within P. Malaysia
- Delivery P. Malaysia to Sarawak
- Delivery P. Malaysia to Sabah
To key in the option weight to price values for the above, below would be the working example:-
Option #1
New Site Name field: Delivery Within P. MalaysiaOption #1
New Site URL field:
500:7.00 , 1000:9.00 , 1500:11.00 , 2000:16.00 , 2500:18.00 , 3000:20.00 , 3500:22.00 , 4000:24.00 , 4500:26.00 , 5000:28.00 , 5500:30.00 , 6000:32.00; 6500:34.00 , 7000:36.00 , 7500:38.00 , 8000:40.00 , 8500:42.00 , 9000:44.00 , 9500:46.00 , 10000:48.00
Option #2
New Site Name field: Delivery P. Malaysia to SarawakOption #2
New Site URL field:500:9.00 , 1000:10.00 , 1500:14.00 , 2000:26.00 , 2500:30.00 , 3000:34.00 , 3500:37.00 , 4000:41.00 , 4500:44.00 , 5000:48.00 , 5500:51.00 , 6000:55.00; 6500:58.00 , 7000:62.00 , 7500=65.00 , 8000:69.00 , 8500:72.00 , 9000:76.00 , 9500:79.00 , 10000:83.00
Option #3
New Site Name filed: Delivery P. Malaysia to SabahOption #3
New Site URL field:
500:10.00 , 1000:11.00 , 1500:15.00 , 2000:31.00 , 2500:35.00 , 3000:39.00 , 3500:43.00 , 4000:47.00; 4500:51.00 , 5000:55.00 , 5500:59.00 , 6000:63.00 , 6500:67.00 , 7000:71.00 , 7500:75.00 , 8000:79.00 , 8500:83.00 , 9000:87.00 , 9500:91.00 , 10000:95.00
Good news, if you are a store owner in Malaysia & using Post Laju services as your currier service, you can just copy the values here to your shipping options ;) .
From the above example we would set:
Store Configuration widget add parameter shipping_weight_increment (at New Site Name field) & the value of 500 (at New Site URL field) - whereas 500 is the increments between the weight values (or easily explained the consistent differences of the entered value weight)And also..
Add parameter
shipping_weight_max (at New Site Name field) & the value of 10000 (at New Site URL field) to set the maximum weight entered for all the options above.To enable the shipping options & display it at checkout, add parameter
shipping_options (at New Site Name field) & the value of true (at New Site URL field).Quick Notes
- If a shipping option is not formatted as per required, shipping rate will return NaN (Not A Number).
- If
shipping_methodnot set toshippingCustom, shipping select will not display. - If a weight is not found in an option, the shipping total will return 0.
You can also use the Shipping Option Tool to help you to create the option weight to price here at http://blogrcart-mnmlis.blogspot.my/p/shipping-options-tool.html. All you have to do is add the values required & this tool will automatically create your options values. Cut & paste the results to your option - its's easy!
You're all set!
| Custom Gadget Location | Store Configuration Gadget | ||
| Reference in Template HTML | <b:includable id='js-cart-shipping'> ... </b:includable> | ||
Parametershipping_* | Values or Type of value to Use | Description | Default |
|---|---|---|---|
| shipping_method | shippingCustom | Enables the shipping options at checkout | false |
| shipping_weight_metric | text / string[predefined] | Pre-defined weight units to use.gram - to display weight units in grams (default)lb - to display weight units in pounds.kg - to display weight units in kilograms. | gram |
| shipping_weight_text | text/HTML | The alert text displayed when an option is not selected. | Please choose a destination. |
| shipping_weight_text | text/HTML | The element id or classname to place updated shipping weight texts & display the select options.[Changes not required] | Est. weight: |
| shipping_weight_increment | number / integer | The consistent wight increment used in mapping the shipping option values. | 500 |
| shipping_weight_default | number / integer | The default weight used if items weight unit is not available. | 500 |
| shipping_weight_max | number / integer | The maximum weight reached items in cart before alerting users. | 5000 |
| shipping_alert_limit | text | The text displayed when cart items has reached the maximum weight.
[Use backslash to escape apostrophe or quotes chars. (\") or (\')] | Items exceeds weight limit. Please reduce items selection |
| shipping_options_id | text/string | The shipping <select> id.[Changes not required] | #shipping-select |
| shipping_select_text | text | Text displayed when shipping select options is not selected.[Use backslash to escape apostrophe or quotes chars. (\") or (\')] | Choose a shipping option. |
| shipping_alert_select | text | Text alert displayed when shipping select options is not selected.[Use backslash to escape apostrophe or quotes chars. (\") or (\')] | Please select a shipping option. |
| shipping_alert_other | text | Text displayed when an option value is set to "Other". Used when not specifying a value for a shipping options to let users continue to send orders. [Use backslash to escape apostrophe or quotes chars. (\") or (\')] | Other shipping selected. You may continue to send your orders. |
Store Related Setup
This section covers this BlogrCart theme helpers which includes:-
- Customize cart view text & labeling.
- Customize add to cart buttons, on click text display.
- Customize alert texts.
| Custom Gadget Location | Store Configuration Gadget | ||
| Reference in Template HTML | <b:includable id='js-cart-setup'> ... </b:includable> | ||
| Parameter | Values or Type of Value to Use | Description | Default |
|---|---|---|---|
Shopping Cart Views | |||
| cart_item | text | Text displayed for items table heading. | Item |
| cart_total | string | Text displayed for totals table heading. | Totals |
| cart_size | text | Text displayed if a product size selection is available. | Size |
| cart_color | text | Text displayed if a product colour is available) | Color |
Shopping Cart Alerts | |||
| alert_cart_empty | text | Text displayed when there is no item in cart.[Use backslash to escape apostrophe or quotes chars. (\") or (\')] | No item selected. |
| alert_cart_added | text | Text displayed if an item have been added to cart.Use backslash to escape apostrophe or quotes chars. (\") or (\')] | Your item have been added |
| alert_cart_target | string | The DOM element by classname or id to target the alert handler.[changes not equired] | .content-wrapper > div |
| alert_cart_scroll_target | string | The DOM element by classname or id to target the scroll to.[changes not required] | .content-wrapper > div |
| alert_not_available | text / HTML | Text displayed at product posts when product status have been tagged with Sold Out.[Use backslash to escape apostrophe or quotes chars. (\") or (\')] | We\'re sorry. Currently this product is unavailable. |
| alert_cart_div | HTML | Alert handler mark-up to append the cart alert text. | <div class=\"alert alert-warning text-center alert-cart\"></div> |
Form Validation Alerts | |||
| form_first_name | text | Text displayed when first name not filled.[Use backslash to escape apostrophe or quotes chars. (\") or (\')] | First name required. |
| form_last_name | text | Text displayed when last name not filled.[Use backslash to escape apostrophe or quotes chars. (\") or (\')] | Last name required. |
| form_email | text | Text displayed when email not filled.[Use backslash to escape apostrophe or quotes chars. (\") or (\')] | Email address required |
| form_phone | text | Text displayed when phone not filled.[Use backslash to escape apostrophe or quotes chars. (\") or (\')] | Phone required. |
| form_postcode | text | Text displayed when postcode not filled.[Use backslash to escape apostrophe or quotes chars. (\") or (\')] | Postcode required |
| form_address | text | Text displayed when address not filled.[Use backslash to escape apostrophe or quotes chars. (\") or (\')] | Address required. |
Locating Checkout Form
To edit the cart form label text go toTemplate HTML > find Blog1 > and expand <b:includable id="post-checkout-form"> .Important: Removing send order form input elements may cause shopping cart & checkout errors but editing the input labels will not.

Locating Cart Summary Placeholders
To edit the cart summary label text go toTemplate HTML > find Blog1 > and expand <b:includable id="post-checkout-form">.Important: Removing or customizing cart summary elements or its classes may cause shopping cart display errors. Editing its labels or text will not.
Locating Theme Built-In Documentation
To view the built in theme cart documentation go toTemplate HTML > find HTML99 > and expand <b:includable id="theme-docs"> .
Locating Theme Plug-in Libraries
Go toTemplate HTML > click Jump to Widget tab > select HTML99 > expand <b:includable id='js-library'>...</b:includable>Removing/Hiding Paypal Checkout/Button
Use CSS & add below at template HTML inside the <b:skin> tag preferably at the end:-.send-paypal { display:none!important; visibility:hidden!important; }
Removing/Hiding Send Order Checkout/Button
Use CSS & add below at template HTML inside the <b:skin> tag preferably at the end:-.send-email { display:none!important; visibility:hidden!important; }
Theme Personalization & Configurations
Tapping in & override BlogrCart configurations using parameters without any programming! List of assigned parameters & available values to include with details description.
Displays a collection of published posts related to the posts displayed using the last Label the post is assigned to.
This plug-in was developed to maintain your blog performance while having the options to control how the related posts displayed. Providing the best solution when displaying content on various screens or platforms.
By default a collection of related posts will display automatically if a post is assigned with a Label via blogger post editor. The related section also by default will display
Use the assigned
An example to display 8 posts at Related Section, go to Theme Configuration widget and enter as follows:-
Click
Use parameters below at the assigned widget to override theme default settings.
This plug-in was developed to maintain your blog performance while having the options to control how the related posts displayed. Providing the best solution when displaying content on various screens or platforms.
By default a collection of related posts will display automatically if a post is assigned with a Label via blogger post editor. The related section also by default will display
n amount of random posts. attached to the last label the post was assigned to.Use the assigned
parameter & add in your custom values at Theme Configuration widget shown at below schedule to customize how the related post will display.An example to display 8 posts at Related Section, go to Theme Configuration widget and enter as follows:-
- At New Link Name filed add parameter
related_max_results - At New Link URL field add value
8 - Click
Save Link
Click
Save to update theme. Preview your post page and by now, the related section will display 8 posts.Use parameters below at the assigned widget to override theme default settings.
| Custom Gadget Location | Theme Configuration Gadget | ||
| Reference in Template HTML | <b:includable id='js-related'> ... </b:includable> | ||
Parameterrelated_* | Value or Type of value to Use | Description | Default |
|---|---|---|---|
| related_max_results | number/integer | The amount of posts to display at the Related Section,Conditions.
| 6 |
| related_max_feed | number/integer | The amount of posts to retrieve from Blogger servers, Conditions.
| 20 |
| related_show_heading_title | true or false | Enables or disables display of related section heading. | true |
| related_heading_title | text/string | Text to display as Related Section heading. | More Related |
| related_show_title | true or false | Displays the title. | true |
| related_title_chars | number/integer | Amount of characters for product title to display if related_title is set to true | 45 |
| related_show_image | true or false | Displays the image | true |
| related_show_thumbnail | true or false | Enables or disables display of image using Blogger squared post thumbnail images. | false |
| related_image_size | number /integer | The size in pixels to retrive Blogger post images. | 480 |
| related_default_image | URL | Default image to display if a product image is not found or unavailable. | http://3.bp.blogspot.com/-O-ykRe1bMOc/UV-70Dzkh5I/AAAAAAAAFbg/mceiiMid-XE/s1600/_notavailable.jpg |
| related_show_price | true or false | Displays the price (if any) | true |
| related_show_status | true or false | Displays the status (if any) | true |
| related_currency | string/text | Displays price symbol. | $ |
| related_currency_after | true or false | Displays price symbol after the price. | false |
| related_feed_class | string | Custom classname reference.[no changes required] | tcol-xs-12 col-sm-12 col-md-3 |
| related_feed_parent_class | string | Custom class name reference.[no changes required] | row |
This theme offers loads of search engine friendly options to give that extra boost for your Blog powered store.
Use Bootstrap3 class naming convention, assign how your text will display. Here are examples typography
To customize the product search bar at error page go to

This theme also uses
To customize the default image go to
Edit the URL highlighted yellow to an uploaded image you require.
In addition, for gallery pages, if however Blogger servers could not reach your post images, a fallback image is displayed. To customize go to
Again, edit the URL highlighted yellow to an uploaded image you require.

To optimize any images uploaded, reduce the image file size to below 150kb in making sure the images will load smoothly on slower internet connections. especially on mobile devices.
Before uploading to your blog use free services like https://tinypng.com/ to automatically compress you large images file size without deprecating the original image output.
This helps to reduce bandwith usages on Blogger servers & also reduce the amount of image space usages on your Google image online storage.
To include your custom App icon, go to
The above mark-up shows and example app icon image used for iOS devices at 76px X 76px image size. There will be more than one mark-up of the same sort to include different icons sizes to accommodate various mobile platforms used, included icon for iOS retina display.
Replace the highlighted URL in yellow to your uploaded blog icon/image. Example icon sizes is included in template download inside the icon folder.

This theme comes with theme utility helper to empty shopping cart automatically afetr a successful checkout form submission.
To empty the shopping cart automatically, at any static page in your blog, add the theme utility helper below inside the blog page editor body in the HTML view.
Click
404 Page Not Found
Error page has already been assigned with this theme. To add text/HTML to error page go toSettings > Search Preference > under Errors and redirections section > click the Custom Page Not Found link > enter the text or HTML required.Use Bootstrap3 class naming convention, assign how your text will display. Here are examples typography
To customize the product search bar at error page go to
Template HTML > Jump to Widget > select Blog1 > expand <b:includable id='main' var='top'> > find <!-- ERROR PAGE --> > edit the text available within the indicator.Common Meta Tags
Common meta tags used by search engines robots have been pre-installed on all pages made at your blog store. The <title> and <description> tags rendered dynamically & unique for each blog pages.This theme also uses
fallback if however users forgotten to write in their custom meta description which is available at Blogger Editor sidebar.Fallback includes a default image meta tag(s) in order for search engines to relate your blog pages with the image you have uploaded via Blog Editor for a specific page. This makes it easy for your to share your product posts to social media too!To customize the default image go to
Template HTML > find <head> & locate below mark-up:-<b:else/> <!-- default image if no image found -->
<meta content='https://blogger.googleusercontent.com/img/b/R29vZ2xl/AVvXsEgyR8SAJRhGkD2H_3fI5GiGEpyTVaJBBxNeASyd3a99mwD9YUCKux2y8__uKhRetMXL8mYP66v3yYecovexcGurbEqD4TGjOubQ3INw9YsiAHXDvNMkT2Fz84SOfL6Z0csUOZANi-JJDBA/s1600/placeholder-image.jpg' property='og:image'/>
</b:if>
Edit the URL highlighted yellow to an uploaded image you require.
In addition, for gallery pages, if however Blogger servers could not reach your post images, a fallback image is displayed. To customize go to
Template HTML > Jump to Widget > select Blog1 > expand <b:includable id='post' var='post'> to view the post template mark-up and fund below:-<b:else/>
<img class='img-responsive' expr:alt='data:post.title' src='https://blogger.googleusercontent.com/img/b/R29vZ2xl/AVvXsEgyR8SAJRhGkD2H_3fI5GiGEpyTVaJBBxNeASyd3a99mwD9YUCKux2y8__uKhRetMXL8mYP66v3yYecovexcGurbEqD4TGjOubQ3INw9YsiAHXDvNMkT2Fz84SOfL6Z0csUOZANi-JJDBA/s1600/placeholder-image.jpg'/>
</b:if>
Again, edit the URL highlighted yellow to an uploaded image you require.
Optimize Uploaded Post Images
Images play an important role to bring your blog content more closely to users/readers at your blog, either in PC or even mobile. Crisp, clear & large images will attract more than text only content, which also supports the topic you are addressing.To optimize any images uploaded, reduce the image file size to below 150kb in making sure the images will load smoothly on slower internet connections. especially on mobile devices.
Before uploading to your blog use free services like https://tinypng.com/ to automatically compress you large images file size without deprecating the original image output.
This helps to reduce bandwith usages on Blogger servers & also reduce the amount of image space usages on your Google image online storage.
Mobile Apps Icons
This theme also comes equipped with mobile apps icons which users can save your blog directly to from a mobile browser directly to their mobile homescreen while displaying a custom icon.To include your custom App icon, go to
Template HTML > find <head> > find below mark-up:-<!-- IOS and ANDROID APPS ICON IMAGES -->
<link href='https://blogger.googleusercontent.com/img/b/R29vZ2xl/AVvXsEgvzhNdXvoYyKkBW6f-7EchGTETDnGgZEXghSUhw7MF-H9Uy8fVqywi915Sw3l9JPTrFdnzOiK9lyRou6AMca5E55lfd9568HQgqKQzjGOscS4vbQMkkKkMLBXaBRtaAqcUIOFKFKsi_HaR/s1600/apple-touch-icon-76x76.png' rel='apple-touch-icon' sizes='76x76'/>
The above mark-up shows and example app icon image used for iOS devices at 76px X 76px image size. There will be more than one mark-up of the same sort to include different icons sizes to accommodate various mobile platforms used, included icon for iOS retina display.
Replace the highlighted URL in yellow to your uploaded blog icon/image. Example icon sizes is included in template download inside the icon folder.
Automatically Empties Cart after Success Form Submission
Applies if you have setup a different success page URL after the template Pages install.This theme comes with theme utility helper to empty shopping cart automatically afetr a successful checkout form submission.
To empty the shopping cart automatically, at any static page in your blog, add the theme utility helper below inside the blog page editor body in the HTML view.
<div id="empty-shopping-cart"></div>
Click
Update to Save your static page & preview your changes.Changing/Updating Send Order page URL
When uploading your sample pages via Blogger dashboard, Blogger servers might change the URL structure of your Send Order page. You can update your Send Email button link/URL by locating below in yourTemplate HTML. Edit the href attribute to insert your new URL to the send order page.

