
- 1 nos .xml file for the template install
- 1 nos .xml file for the pre-installed sample pages, tutorial page & customizing page which includes example product post.
- 1 nos .txt file for the ADVANCED Auto Product Post Template
This really speeds up the installation as no copy & pasting of additional codes required to cut down the installation process duration.
For FREEMIUM BlogrCart Butik users, click the Guide > Customize Freemium drop down link for the full installation page (codes & illustrations included).
Step 1
Install BlogCart Butik Template Codes.After downloading the files, unzip the files using your favourite program on your computer. In your Blogger dashboard > Template > Backup/Restore button > Upload template files.

Users can also copy & paste the codes in the template editor body (from the downloaded template file), but to ensure there are no errors, it is best to upload via Blogger servers so it will automatically check for any viruses, trojans or unwanted codes in a Blogger template.
Step 2
BlogrCart Butik PRO Sample Pages & Products
Exclusive for PRO template users, an additional file is included to easily upload and publish to start of your Blogger store settings. Now go to Settings > Other > Import Blog > and select the PAGES .xml file for upload.
If the correct file is detected by Blogger servers, key in the required captcha input fields and click the "Upload" button. IMPORTANT - Remember to tick/select "Automatically publish all imported posts and pages". for this installation. Refer screen shot below.

Step 3
View Sample Posts & Pages
Now you can view your sample posts & pages. We also included some detail tutorials to help out on your customizations. During this blogger import, your blog will be equiped with sample product posts, success page, error page, send order page (with custom checkout send order form included) & reference tutorial pages.
Go to the PAGES section and "View" the published pages to grab the URL's needed for your send order e-mail settings. Use your browser bar to copy the URL's & paste in your favourite editor. The URL's required for your send order email settings are as follows:-
- Send Order page (Ref: Send Order URL)
- Succes page ( Ref: Success URL)
- Error page (Ref: Error URL)

An example of the default widgets included for BlogrCart Butik e-commerce template are as follows:-
Important Blogger Theme Update - April 14 2016!
To allow the Theme Plug-ins gadget to register itself with your new theme setup, users are required to activate the
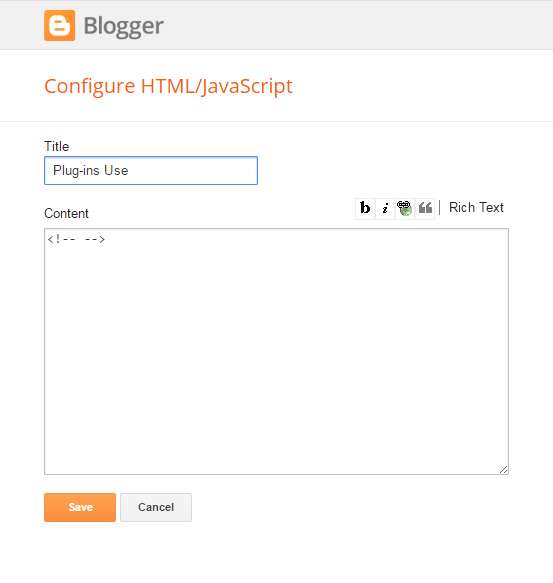
To allow the Theme Plug-ins gadget to register itself with your new theme setup, users are required to activate the
HTML/Javascript gadget with the title Plugin or DoNotRemove Cart Plugins or Plug-ins Cart located at the bottom of theme Layout. Click Edit the said gadget & add some content to save it. View screenshot below for reference.


Please easy way to set up .
ReplyDelete